One of the methods I use to market books is creating book trailers. When I was first looking into self-publishing, I noticed that a traditional Christian publisher had book trailers for authors on YouTube, and realized that could be a great marketing method.
But, I don’t have professional video making or editing software. Lucky for me, when I was in college studying for my Information Technology degree, I learned some tips and tricks in the Microsoft Office suite that have helped make promotional material for my books and blog.
Today, we’ll go through a crash course on how to make your own book trailer in Microsoft PowerPoint using free media resources online. Let’s get started!
Please note: If you are creating the book trailer for commercial purposes, it is recommended you purchase the Business edition of Office.

Selecting a Professional Background
For my debut novel, Can’t Beat the Heart of a Carolina Girl, I made a trailer for its initial release, and another when I relaunched the book with a new cover in July 2018.
A mistake I made when creating the original trailer for Can’t Beat the Heart of a Carolina Girl was using a Microsoft PowerPoint backdrop instead of a professional looking image that highlights the book’s content. As you can see in the new trailer above, a picture of a blonde girl was selected for the background instead to portray the main character, Riley. If you want to use several different images, feel free to browse for more!
Sources for Professional Images
Where can you find professional images that are free to use for commercial use? My personal favorite is Pexels, but my sister, (who is a graphic designer), favors Pixabay. Either way, I highly recommend both.
Selecting the Images
Both of these websites have search features to aid you as you browse for your background image(s). For the book trailer, I recommend horizontal images. Once you find an image you love, click on the image, and you’ll be directed to the image’s detail page. Here you’ll find information on who uploaded the image, and what kind of sharing license it has. Photos marked with a CC0, or public domain license are what you will want to choose, unless you have a paid subscription to other photo sharing sites.
Click here to view the FAQ page for the CC0 Creative Commons license to learn more.
Though public domain images do not require those who use the photos to credit the photographer, I recommend that you do so to support the photographer and thank them for making their photos available as an act of courtesy.
If you’re satisfied with the image, click the Download button. Specify where you’d like the file to be saved. I recommend making a folder within your Documents or WIP project folder and naming it “Book Trailer”.
Creating the Book Trailer
Beginning and Setting the Background Image(s)
Now, open PowerPoint on your computer. I use Microsoft 365, so the tools in my screenshots may look different if you have an earlier version of Office. For the purpose of this tutorial, I’ll be sharing screenshots of the book trailer for my newest release, Speak Your Mind.
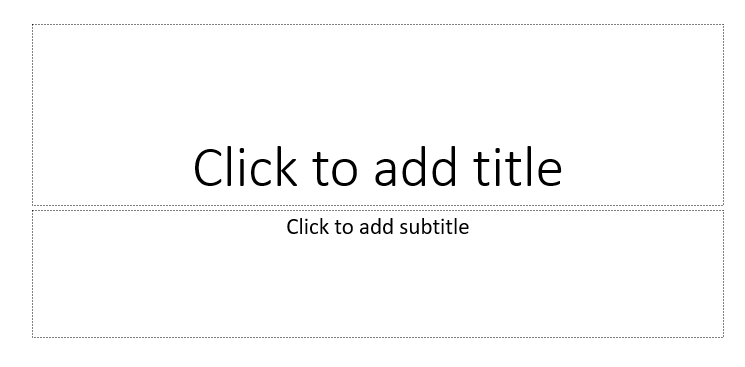
On the Title Slide, click the preset title and subtitle boxes on their borders, and hit the Delete key. We will not be needing these text boxes, as we’ll be adding our own later.

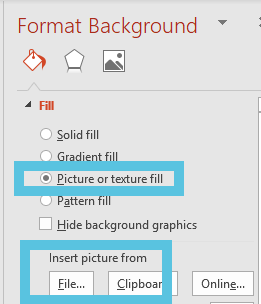
Click the Design tab near the top, and select the Format Background button. When a menu appears on the right side of the screen, choose the Picture or Texture Fill option. An Insert Picture From option will become available. To add your background picture, click File, and then browse to your Book Trailer folder to select your picture. Click OK.
Inserting Textboxes
Now that we’ve added our cool background image, let’s insert the textbox(es)! The textboxes on each slide will house your book description. It helps to have your book description saved in a Word document before beginning.
Each textbook will hold one phrase (up to the comma) of a sentence, or one full sentence. If you have longer sentences, I suggest breaking each phrase up into its own textbox. For Speak Your Mind‘s trailer, I just gave each whole sentence it’s own textbox.
To insert a textbox, click the Insert tab on the ribbon, and then the Textbox button. You will then need to draw your textbox on the background image below. To draw the textbox, click an area on the screen, and drag the cursor outward. When you’ve got it big enough for your liking, release the left mouse clicker, or your pressure on the trackpad. From there, click within the textbox and paste the first phrase or sentence of your book description. Then, you can change the font color, style, and size as you like.

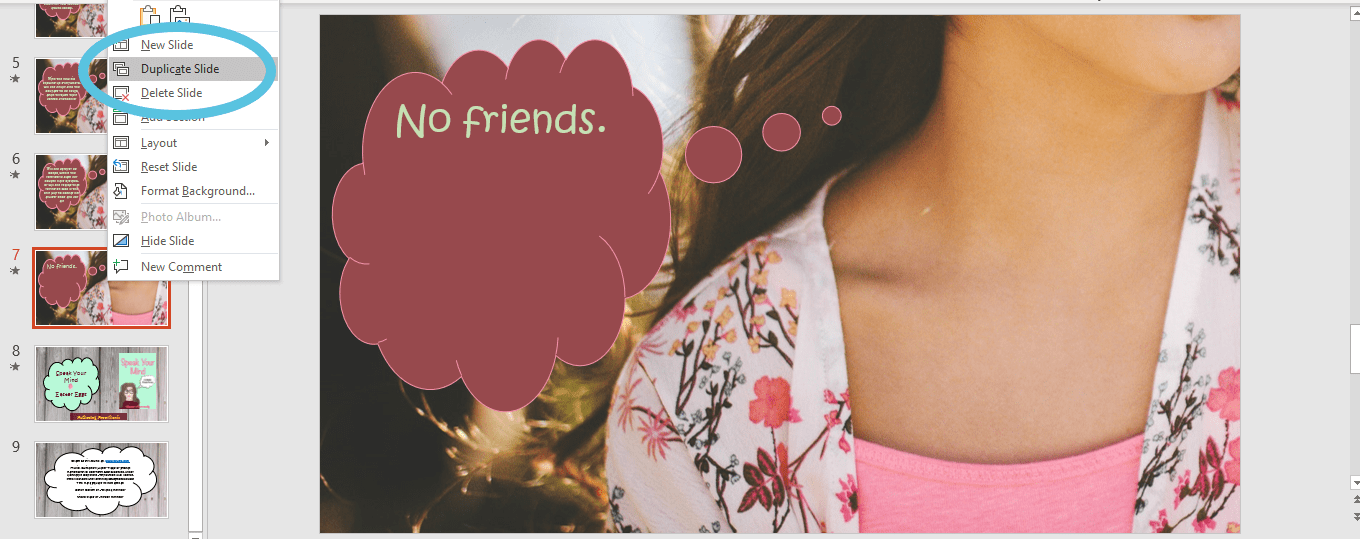
Try to limit each slide to one or two full sentences per slide. To make it easier on you when you need to add more slides, right-click the first slide and click the Duplicate Slide option. This will provide you with an exact copy of the first slide that you can manipulate to add the next few lines of your book description.
Highlighting the Book
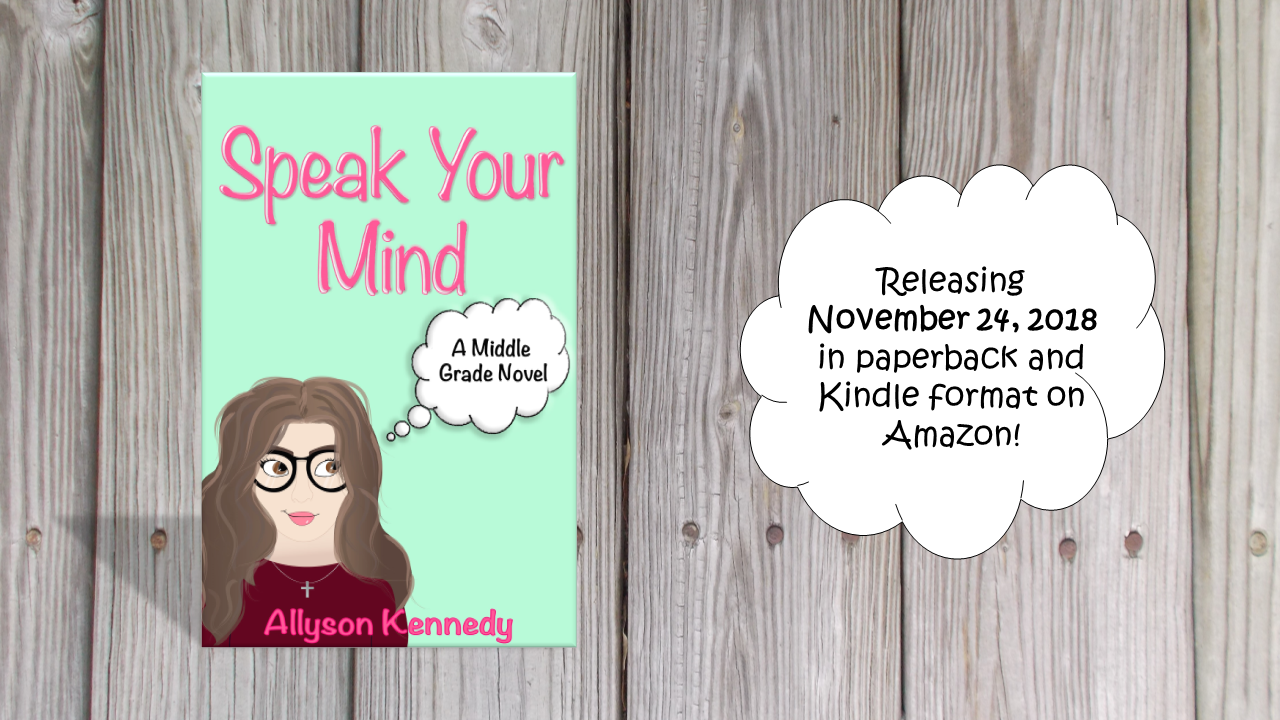
Once you’ve finished adding the book description, insert a new slide with a different background. Now it’s time to highlight the book! Once you have inserted the new background image, click the Insert tab again, and click the Pictures button. Navigate to the folder where your Book Cover image is saved, and select it.
Drag the cover image to where you want it on the slide. Next, insert a new textbox. In this textbox, type any promotional message you’d like. Because I made this book trailer for Speak Your Mind‘s release, I added it’s release date and where the book can be purchased.
Bonus Tip: If you save the single slide as a JPG or PNG file, you can double this PowerPoint slide’s use as a promotional image!
Adding Transitions, Animations, and Timings
Woo! So now you have completed the skeleton of your book trailer! Be sure to save the file in your Book Trailer folder. Now it’s time to add transitions!
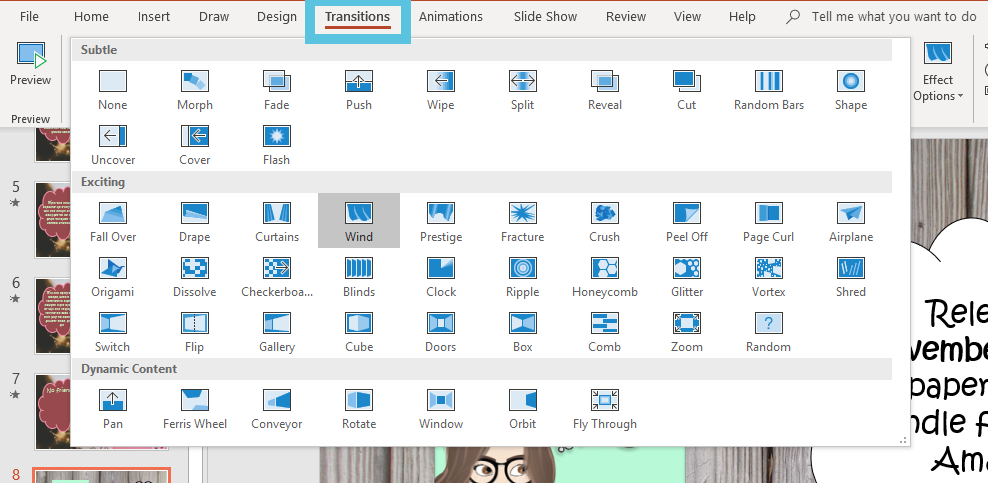
Click the Transitions tab on the ribbon, and click the expander on the choices menu. I recommend you choose one transition style for your entire presentation. Using multiple transitions will distract viewers from reading your book description due to the screen moving around so much! 😛
When you finish choosing your slide transition, you’ll need to add Animations on your textboxes and Timings on your slides.

For Animations on larger textboxes, I recommend setting 00.50 duration, unless you would like to emphasize the text longer. Then you could go with 1.00 as pictured above. For slide duration, I recommend a duration of 02.00 and advancing the slide after 00:08.00. You can edit these by going to the Transitions tab, clicking on your textbox border, and changing the duration. Make sure you UNCHECK the On Mouse Click notation, and choose to advance the slide After 00:08.00 (or your choice) seconds.

Previewing the Video
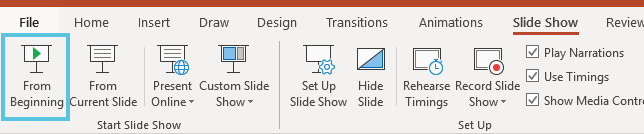
Ultimately, the Duration and Advanced Slide After settings will vary per video and are entirely up to you! To test your transitions, animations, and timings, go to the Slideshow tab and click From Beginning. If done correctly, the entire PowerPoint will play through like a video.
Adding Music
You can add CC0 music, or add your own song by going to the Insert tab, selecting audio, and then selecting the song of your choice.

Saving the PowerPoint as a Video
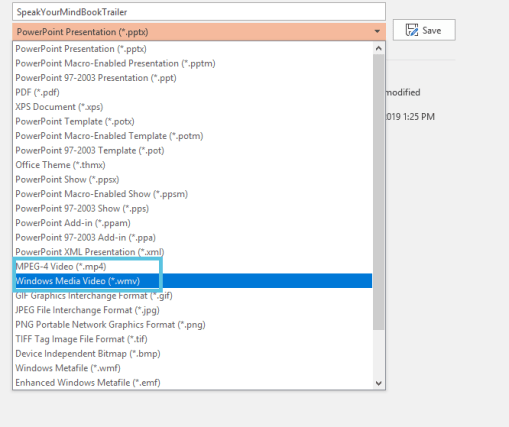
Finally, once you are satisfied with the way the slides are playing, save your presentation as a video. To do this, select File and Save As. Browse to your Book Trailer folder, and change the Save As file type to either MPEG-4 Video, or Windows Media Video.
Final Product
Your video should now be compatible to upload to YouTube, Facebook, Amazon’s Author Central or any other video sharing site. Remember, to share on Goodreads, you must link to your YouTube upload.
I wish you all the best of luck with your book trailers!
Talk to Me, Arrowheads!
Have you ever made a book trailer? I hope you enjoyed this tutorial and found it helpful! Feel free to share your own book trailer links in the comments! 🙂
Interested in reading the books mentioned in this article? Click here to purchase your own copies of my books!
Aim high, stay strong, and always hit your mark.
-Allyson 😀

Wow ..I made an amazing book trailer, thanks to your guide. Keep it up and thanks!!
LikeLiked by 1 person
That’s awesome! I’m glad it could help, and thank you!! 😊
LikeLike